Showing posts with label Art and Craft. Show all posts

Wednesday, October 19, 2011

~ Handicraft - Green Pig Pinata ~

After a pretty successful hit with my red and black bird pinatas, I made a green pig pinata for Andy's eldest son, Wenwei. His birthday is still 2 months away but I guess it's no harm making it early. ^_^

Instead of using acrylic paints, I decided to use crepe paper as the base this time. Took more time to make this pinata and I hope the children will have lots of fun.


Denver & Gladys - Angry birds lovers and my models.

Care to have a pinata as a birthday surprise? Leave me a message. ^_^ 

Tuesday, September 27, 2011

~ Handicraft - Angry Bird Pinatas ~

In celebration of Gladys' 5th birthday, I decided to make a pinata since we will be inviting friends to the chalet. There will be a lot of children and it will be a fun activity for all to play.

The idea came only 2 days before heading to the chalet and time is very limited! After googling online on how to make a pinata, I starting working through the nights...

Materials
• Balloon
• Newspaper (shredded into strips 1-2 inches long)
• Flour and Water (this will be used to make paper mache glue)
• Glue
• Scissors
• Acrylic Paint / Crepe Paper
• String

Instructions

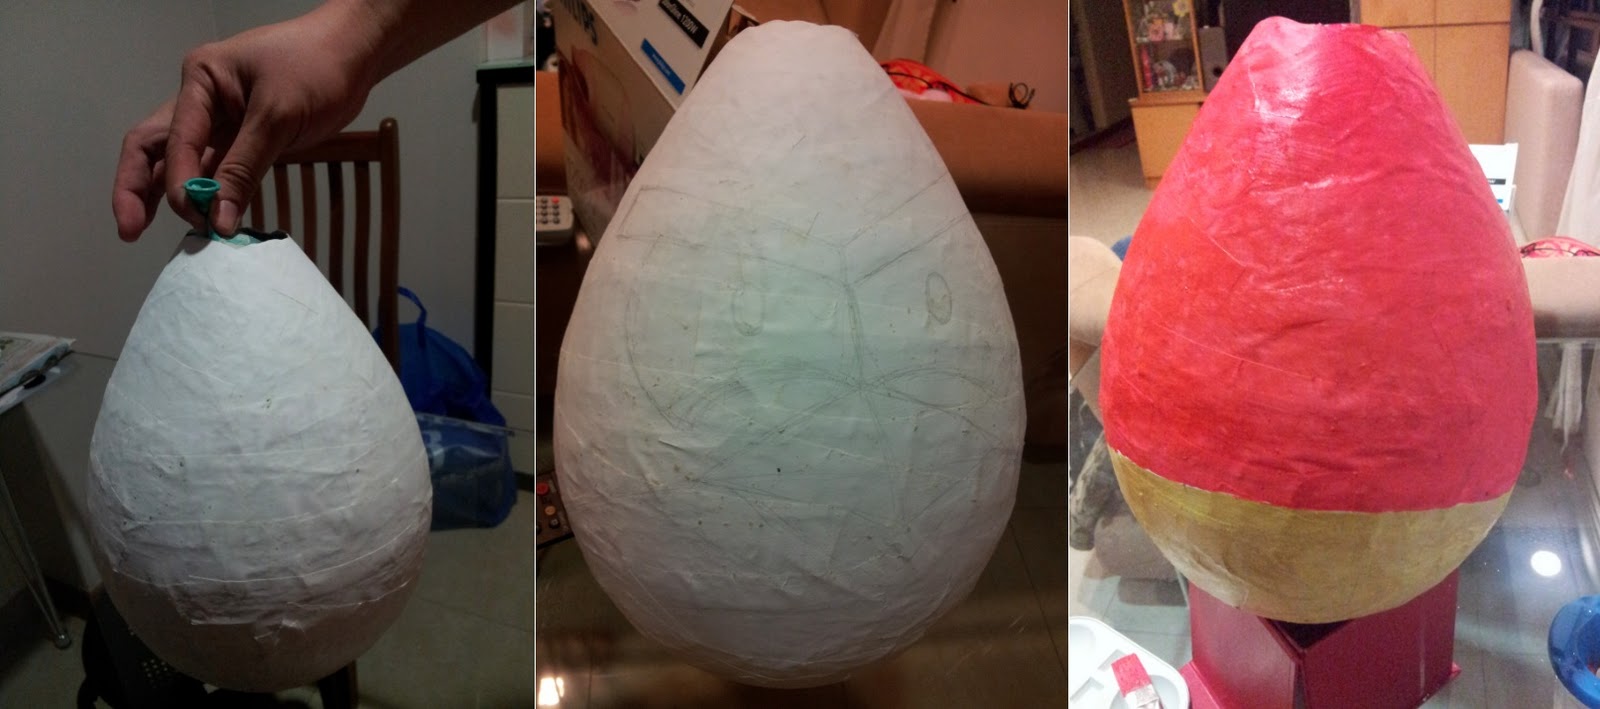
1) Blow up your balloon to the size that you wanted. (You can choose a big or small balloon depending on your design/needs).

2) Place your balloon in a bowl so that it will not move around as you are sticking the paper on it.

3) Prepare lots of newspaper strips (about 1-2 inches long)

4) In another bowl/container, mix 1 part of flour and 2 parts of water together to make the paper mache glue.

5) Dip the newspaper strips one at a time into the glue mixture.

6) Use your fingers or the side of the bowl to remove the excess glue mixture off from the newspaper.

7) Apply the newspaper strip to the balloon.


8) Cover the balloon with one layer of newspaper, leaving a hole on the end uncovered. Let the balloon dry for a few hours or overnight, and then add another layer of paper mache.

9) Repeat this process until you have covered the balloon with at least three layers of paper.

*Note: Since this is my first attempt to make a pinata, I wasn't sure how many layers of paper to put. The more layers you add, the harder the pinata and it will be difficult for the children to smash it later on. As an experiment, I made one with 3 layers and the other with 4 layers.

10) Pop the balloon when the paper mache has dry up. Poke 2 holes at the top of the pinata. Run a string through the holes later on so that the pinata can be hang.

11) Decorate your Pinata! Basically you can decorate it with crepe paper by gluing strips of colourful crepe paper around the pinata.

I decided to make an Angry bird theme pinata and hence I did a rough sketch and painted my pinata with acrylic paints. Acrylic paints is recommended as it dries up faster and gives it a shiny, glossy look compared to the normal pastel paints.


I cut out the shapes for the eyesbrows, eyes, beak and tail from a paper and painted it. Then, they are glued to the pinata to give it a finishing touch.


Instead of one, I made 2 Angry bird pinatas following the same procedures.

Since it was meant to be a surprise, I stayed up after the children have slept to work on this project. After two sleepless nights of hard work, the Angry Bird Pinatas are born! It was my first attempt  making a pinata and I think I did a pretty good job! ^_^ With that, you can put the candies and stuffings into the pinatas and bring it to the party!


Sunday, September 04, 2011

~ Paint A Smurf @ NorthPoint ~

Thanks to Andy, our family had the opportunity to join in the Paint A Smurf contest at NorthPoint. Upon entering, Denver and Gladys were given a smurf figurine and a paint set each. They'll get to paint and design their own smurf. :)


Daddy and Mommy helped them to hold the smurf, mix the colours and paint those difficult corners/edges while the kiddos paint. We have 30 minutes to complete painting our little smurfs and the top 5 smurfs who got the most cheer will win a prize.


Time is short but we managed to complete it. :) Denver named his smurf as "Messy" while Gladys likes her smurf as "Pretty".


 Now it's time for the verdict. Which smurf will get the most cheer?

Gladys has been a good sport as she cheered for all the other smurfs loudly. For her great cheerleading effort and big-heart, her Pretty Smurf wins a Prize! ^_^ Denver also helped us won 4 tickets to watch The Smurfs movie!

Each family gets to bring home a goodie bag consisting of a box of Oreo cookies, a complete set of Smurf magnets and a Smurf boardgame! We are really grateful and enjoyed the time together at the event.

Sunday, August 21, 2011

~ Drawings - My First Canvas Painting ~

Two months ago, I took Denver to participate in an art lesson held by Naive Art. While waiting, I drew a sketch and paint with the materials provided. Wasn't really able to complete it during that 2 hours period but I managed to finish it at home. This picture is currently pinned in the children's room for all to enjoy. HAHAHA! ^_^  

Friday, July 15, 2011

~ Handicraft - Gladys @ Art & Craft Stall ~

I'm not exactly sure what this handicraft is called but it is commonly seen at the little art & craft stalls in the shopping malls. Simply choose a picture of your preference, apply the colour substance on the art work. Using a toothpick and cotton bud to touch up. Upon completion, it will be heated up in a toaster and the final art work is complete.

We were at Downtown East and Gladys has been pestering me to let her try it. A small art piece is at $5 (prices may vary slightly at different stalls). As an exception case, she finally got to try it. Denver and Mommy also helped to do this together and it's finally completed putting a big smile on Gladys.


Monday, June 27, 2011

~ Handicraft - Sand Art ~

During our trip to Genting last month, we redeemed 2 pieces of Sand Art using the points gathered at the arcade. As soon as we returned, Gladys didn't forget to remind me to do this with her. :)

We finally sat down and spent some time in the evening completing the Sand Art together. Ironically, it was also my first time doing this and I didn't know where to start.


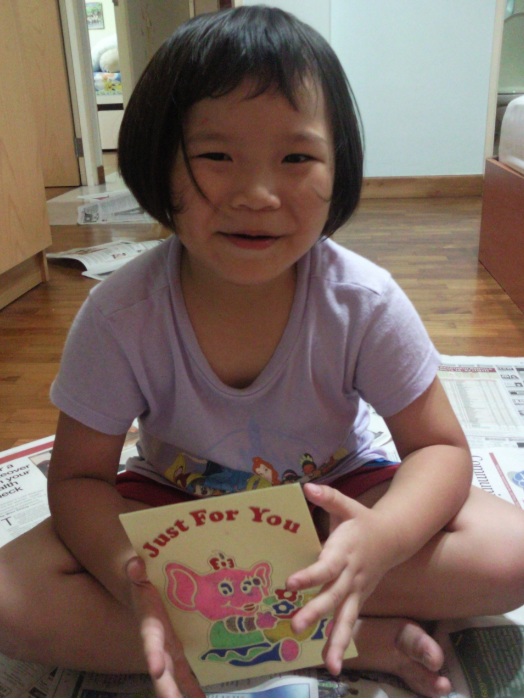
For a start, I peeled the wrong side of the paper out. I also believe I should have started filling up the empty space with the darker sand colours too. The bright pink colour went really nice on the Elephant skin but the problem arises when I start to put the darker blue and green on the picture. It 'stained' the lighter pink area and made it looked darker.


The end product wasn't too bad but the most important thing was Gladys enjoying herself 'playing' with the sand and mixing it. :)

Saturday, April 23, 2011

~ Handicraft - Easter Bunny Hat ~

Gladys was very upset when she missed her Creative Play & Learn lesson due to a persistent fever. She has been looking forward to Saturday and even packed her bag last night.


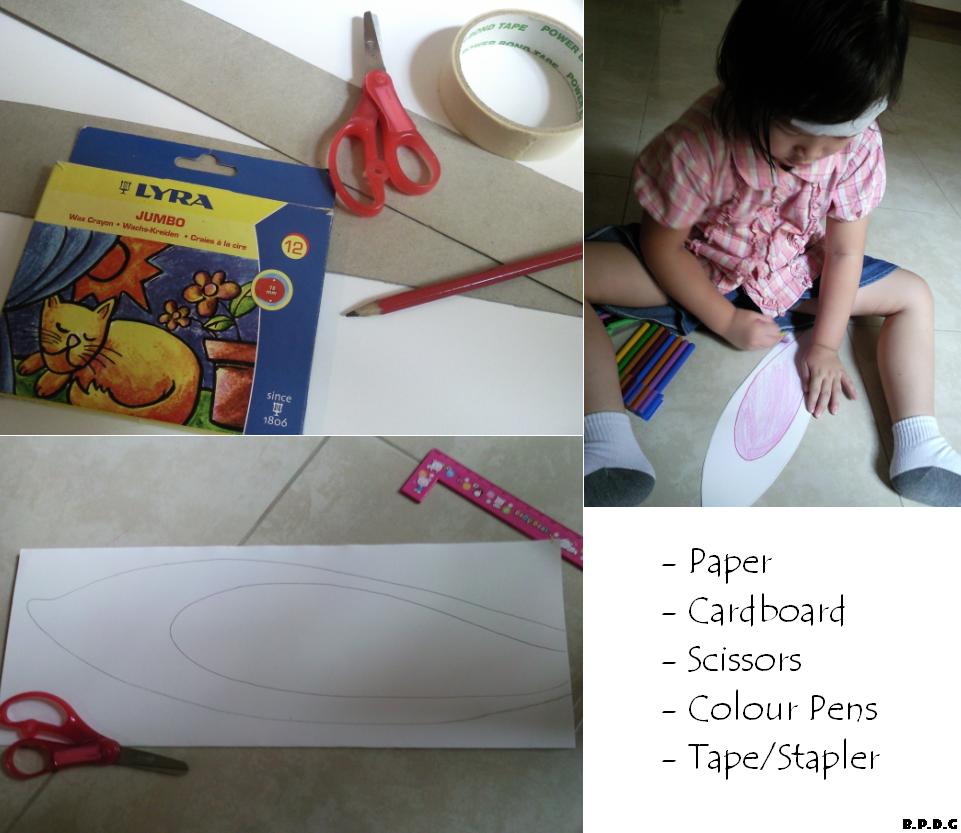
To ease her sadness and disappointment, we did a little handicraft ourselves. Since it is Easter Sunday tomorrow, Mommy suggested to make an Easter Bunny Hat. That idea surely cheer Gladys up a lot. It's really easy to make and didn't take up a lot of time. I used the strips of the cardboard as the base of the hat. Then, I drew the outline of the bunny ears while Gladys helped to colour them. We cut out the 'bunny ears'  and paste it to the cardboard.


There you have it! An Easter Bunny Hat!

Sunday, April 10, 2011

~ Handicraft - Gladys' Tree ~

Gladys always love art and handicraft. Every weekday, she will scribble and draw on papers, fold and wrap around with rubber bands and giving it to me as my daily present after work. It could be a simple "Gladys love Mommy", "Mommy love Gladys" to a picture of both of us together. :)

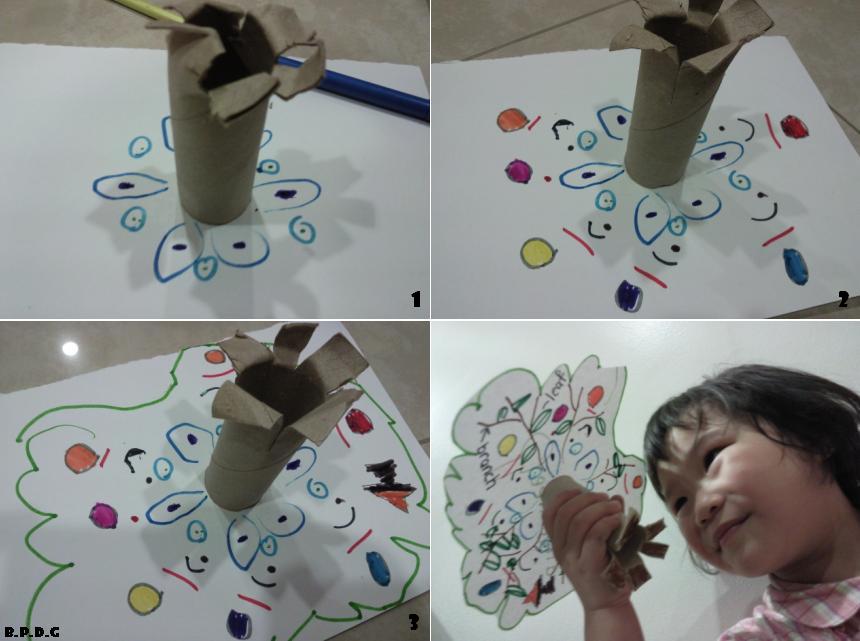
Today, she did her very own handicraft without Mommy's instruction! It's amazing to see how creative a child's mind can get and it all started with a toilet roll.

Here I was helping Denver with his art homework while Gladys sat down to do her own art work as well. By the time she calls me, she has made some cuts at the bottom of the toilet roll, placed it on a paper and drew some shapes around it.

I couldn't make out what it was and asked: "What is this?"
Gladys : "I'm making a tree!"
Mommy: "Wow!"

When I got back shortly, Gladys glued the toilet roll on the paper and there are more shapes around the roll. The kids said it is an 'upside-down' tree. :) I helped to cut out the border of the leaves and the tree is finally completed (after a nice flip) !


To make it more interesting, I labelled the parts of the tree. "Roots", "Trunk", "Branch", "Leaf". Gladys gets to learn as she has fun with her art. :) It is really a nice artpiece and I'm impressed!

Thursday, January 20, 2011

~ Drawings - Picture for a friend ~

Gladys received an art piece from her classmate, Louis and so she also wanted to draw a picture and give it to him tomorrow. Gladys loves to use markers with different colours in her picture. I think her drawings have improved too. :)

Friday, December 24, 2010

~ Drawings - Gladys' Art Showcase - Part 1 ~

It has been 2 half months since Gladys started her drawing and colouring class at the community centre. She has been enjoying her lessons so far and completed 12 drawings. ^_^

Initially I thought it might be too challenging for her to follow as the pace of the lessons are very fast. However, never underestimate a child's learning ability and adaptability. Not only was Gladys able to keep up from second lesson onwards, she had heaps of fun.

These are the artworks that she did using oil pastels and water colours. From lions, flamingoes, bugs to Doremon, fishes, kite flying. There are different theme to draw each week.


On their final lesson for this term, the teacher taught them to draw Santa Claus, Christmas tree and presents. This is a perfect Christmas card. :) Here's wishing everyone MERRY CHRISTMAS!

Friday, November 26, 2010

~ Faber Castell Mulberry Fibre Paint Set ~

I always enjoy art & craft and drawing since young. Gladys seems to have inherited this part of my genes and enjoys it too. I particularly like Faber-Castell's products regardless if it is colour pencils, crayons, pencils or erasers. They are of a better quality and we also enjoy watching the VCD where artist, Einstein Kristiansen will show you how to doodle and draw cartoons.

Yesterday, a good friend of mine gave us a box of Faber-Castell Mulberry fibre paint set. We saw this paint set at various sales exhibition before but never bought one to try. :) Gladys was so happy to see the box and can't wait to open it.


Inside the box set, there are 6 coloured fibre paints, a pair of tweezers and a stick. Gladys uses the tweezers and take the paint while Mommy uses the stick and spread it nicely on the picture. We spent the night completing the art piece and here's how it look before and after. Not bad for a first timer. ^_^

Saturday, October 30, 2010

~ Nativity Open House cum Art & Craft Exhibition ~

It is Open House Day in Nativity Church Kindergarten and the school also take this opportunity to show case the students' art exhibits. Parents are invited to come to give their support as well as rapport with the teachers and understand how their children are learning in school. Gladys is very happy that Daddy & Mommy are going to school with her and she gets to see her friends.


Every classroom has been beautifully decorated with all kinds of art works made by the students. It is so vibrant, cheery and innovative. Really appreciate the teachers' effort in putting this up. The children have did so well!


Among all the different artworks, we have to go 'hunt' for Gladys' masterpieces. :) It's not too hard to look for her name. We are so proud and glad that she is learning happily in school.


Gladys loves her friends as well as her teachers. ^_^


There was also a mini music lesson where parents are encouraged to participate with their children. We get to pick a different instrument and played with the music. This is what the children do during their music class. A lot of sounds, happiness, fun and enjoyment. ^_^

Thursday, October 07, 2010

~ Drawings - Missing Denver ~

It has been 3 days since we seen Denver. Due to the Conjunctivitis virus, Denver has been living with my in laws for the time being. Gladys has started to miss her gor gor and says she wants to make a present for Denver since yesterday.

It's funny and contradicting. Whenever Denver is around, Gladys will fight with him for TV channels, chance to play the computer games, food and almost everything. Now she is home alone with us, I guess she felt the loneliness that no one is around to play and fight with her anymore. :) Time for her to appreciate her brother more.


And so, she started drawing a picture as a present for Denver. I was busy washing up as she gets on to work, scribbling on a piece of paper all by herself. I am delighted to see the lovely drawing that she drew earlier (without me telling her what to do). I teach Gladys to use the marker pens to outline the pencil mark first before using the colour pencils to colour the picture. This will make the drawing more prominent, colourful and lively. A little surprise for Denver when he comes home in a few days time. We all misses you!

Wednesday, September 29, 2010

~ Gladys' first art lesson ~

Gladys has been telling almost everyone that she is going for an art class. She has been counting down the days since Sunday and is SO looking forward to it. Denver never had that kind of reaction when he goes for his Creative Play & Learn class 2 years back. I believe the difference is Gladys specifically wanted to go for the class versus we suggested the class for Denver.

There were already many children waiting outside of the classroom when we reached. Today is the start of a new class but it seems to me many children continued from their previous lessons. Most of them knew what to do and Gladys is probably the only new student (who seems lost) joining. Nevertheless, I'm glad that Gladys is brave and not shy at all as she sits through.

First lesson has been chaotic (at least in my perspective). I guess there was too much anticipation and I ended a little disappointed. I would appreciate if the teacher could orientate the parents with the children who just joined the class. Gladys was waiting at her seat not knowing what to do and poor Mommy (who was tired after a long day at work and feeling lost) tries to approach the busy teacher on what to do. The entire class was noisy but I managed to compose myself and observe what the other children are doing to follow suit.

For a start, the children are queuing up with a piece of paper in their hands. (It is half the size of a drawing block). I quickly asked Gladys to join in the queue too. The teacher will draw sketches of simple lines and shapes (faintly) on each paper and tells the child to trace over it when they get back to their seats.

There are basically 2 levels of students here. (A) for Advance and (B) for Beginner. The teacher will based on the child's level to determine which group they belong to and what they will draw. He will then goes to the white board and divide into A and B portion. The (A) drawings are much more complicated and the children in the Advance category will follow the (A) drawing and vice versa for the (B) group.

This is really a test of concentration and following instructions because there is simply no time to lose! Gladys was pretty lost and worse of all she sat too far away from the board to catch up with what the teacher is drawing!

After following through the first lesson with Gladys, this is pretty much how the lesson is run.

1) Children will trace the simple sketches drew by the teacher at the start of the lesson.
2) Following the teacher's step by step instruction on drawing from the basic sketch.
When the teacher says "Pencil", hold your pencil up and gets ready to draw. They will need to follow exactly what is drawn on the board. Whenever the child is unable to follow/draw a certain part, he/she can goes up and approach the teacher for assistance.
3) Following the teacher's step by step instruction on what colours to use.
The teacher will ask what colours he is using to colour the fish and the children will participate by answering. (Light green, Orange, Beige, dark yellow... etc). Luckily Gladys knows her colours very well to catch up.
4) Getting ready for water colours and painting.
Children needs to fill their little containers with water and follows instructions on what colours to paint.
5) In between the lesson, there is one toilet break. This is the time the children go to relief themselves. I saw Gladys following suit as she ran to the toilet, pee and ran back to class again by herself.

I won't be able to sit in for the following lessons as the teacher is only allowing parents to join in for the first class. It may take Gladys a few more lessons before she catches up. I'm not sure how confident she will feel as she did mention after her lesson that she is worried about not being able to follow up with the teacher. I hope this will not discourages her from enjoying her future lessons.

In fact, I think she did really good today on her first art lesson. She traced nicely and tried her best to see and follow what the teacher is drawing on the board. Gladys also displays a lot of effort to colour and paint her picture nicely. (I only feel it may be better if the teacher has been more encouraging. At times, he will comment that the child is drawing/colouring too slow and needs to speed up. This really sounds a bit pressing.)

Still, it is not all that bad. Through this lesson, apart from learning the basic drawing techniques, colouring skills, knowing more about colours, shapes and sizes, children also learns to be discipline, independent, pay attention to details and follow instructions. This might be a good training for Gladys in a certain sense and we will just have to see how it goes for the next few lessons.

Sunday, September 26, 2010

~ Art class registration for Gladys ~

Gladys has turned 4 officially and as promised, we registered her to an art class from Sengkang community centre today. Gladys displays more interest in art and she has been asking us to send her for drawing/colouring lessons for months!

Earlier, Hubby & I had a look at the program schedules from the CC and we managed to choose a suitable date/time among our working schedule for her to go. Gladys is so happy that she even thought that her class starts tomorrow! We bought some art materials and packed them nicely in a bag all ready and set for her first arty lesson.


In the past, Gladys always tag along whenever we send Denver for lessons. She will linger around in the classroom and seems reluctant to leave the room at times. Soon, it will be her turn attending the lessons and Gladys even told us that she'll say "Goodbye" to us. :) We'll see what happens on her first day in class at the CC.

Saturday, September 04, 2010

~ Handicraft - DIY Mid Autumn Festival Lantern ~

Denver has an assignment from school - to make a lantern for the Mid-Autumn Festival which is about 2 weeks away. Since he is still down with a fever, we stayed home to make the lanterns.


Materials required : Red packets, paper/coloured paper, stapler, coloured pens, strings and scissors.

The kids drew and colour on the paper while I help them to cut and put the lantern in shape.  For the bigger red lantern, I teach Denver how to fold the red packets and stapler them into position.


These D.I.Y lanterns are very easy to make and the kids will enjoy seeing their lanterns on display. Gladys is posing with the lanterns on behalf of Denver.

Thursday, September 02, 2010

~ My Birthday Presents - from Denver & Gladys ~

Simply spending my birthday with my love ones is a blessing. Hubby took me to eat dim sum for breakfast and helped me with some of the housework. This is always the best chance to ask for his help since he will usually obliged on a special day. :)

We picked the kids after they finished school and went out to window shop around Orchard road. Dinner was at Cafe Cartel and the whole day of work and walking has exhausted Hubby totally. :) Thanks Dear for putting in such a big effort.

Denver & Gladys on the other hand seems to be pretty active still. They worked on drawing me a birthday card as soon as we got home. (I was instructed not to peek while they are at works.)

Gladys wrote "Gladys Heng Love Mummy" on a piece of paper, put it in an envelope and sealed it with glue. She happily passed the letter to me and said "Happy Birthday, Mummy!". Awwww .. so sweet!


Denver on the other hand, spent more time decorating his card which is so colourful. "Happy Birthday Mummy" and there are so many balloons, confetti, shapes and hearts. Gladys seeing her gor gor made such a pretty card for me decided to re-do her card but this time with more colours! Competitive.. Hahaha!

The cards are so pretty! I framed them up and it is now in the children's bedroom for all to see everyday and night. :p


Birthday is not complete without a birthday song from Denver & Gladys. They are sleepy by now but still very playful. ^_^ Thank you Hubby, Denver and Gladys for just being with me!

Saturday, August 28, 2010

~ Handicraft - Egg Carton Caterpillar ~

Gladys has been pestering me to do painting almost every day. To fulfill her wish, we got together with our egg carton artwork again. This time we'll be doing Egg Carton Caterpillar. The materials are very simple and easily available.

First, parents will need to cut out a row of 'cups' from the egg carton. Depending how long you want your caterpillar to be. In this case I have a row of 3 'cups'. Next, it's PAINTING time. This is what Gladys enjoys doing most. Be sure to lay the newspapers and prepare tissues as it is going to get messy.


Paint and decorate your caterpillar in whatever colour or design you like it to be and leave the carton aside for the paint to dry.

Finally, poke 2 holes on the top of one of the egg carton 'cup' where the head of the caterpillar is suppose to be. Put the straws through it as the 'antenna'. You can also stick some straws at the bottom as it's legs. (I skip that part.)


Here you are! Two Egg Carton Caterpillars! :)

Saturday, August 21, 2010

~ Drawings - Flowers ~

Gladys wanted to paint but Mommy is feeling tired today and hence 'persuaded' Gladys to settle for Crayons instead. Crayons can be quite messy too but the colours are bright and cheery.

Gladys drew flowers today. The brightest flower among all is hers while the rest are all greenish.


Mommy's one is more colourful. Assorted flowers for all.

Saturday, August 07, 2010

~ Drawings - Ladybirds ~

This morning is teaching Gladys how to draw ladybirds. I think it is one of the easiest for kids to learn with it's simple outline and shape. Drawing many ladybirds on the paper can be very pretty too and it is only red and black in colour. :)


Here is Gladys' and Mommy's drawing of ladybirds. :) Gladys says it looked like the 'mouse' for the computer. :)